This is part of the "microprogramming notes" web pages, which contain the
following subtopics:
- Simple one-bus CPU architecture
- Register in / out connections
- Microcode examples
- ALU architecture (insides) <-- you are here
- ALU interface (outsides)
- Control circuitry
- Simple two-bus CPU architecture
- Simple three-bus CPU architecture (used in RISCs)
ALU architecture
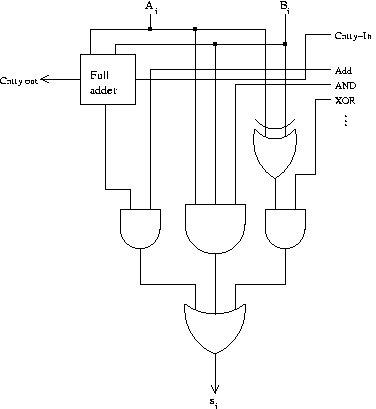
First of all, here is a one-bit "bit-slice":
We can use n of these ALU bit-slices to make an n-bit ALU:
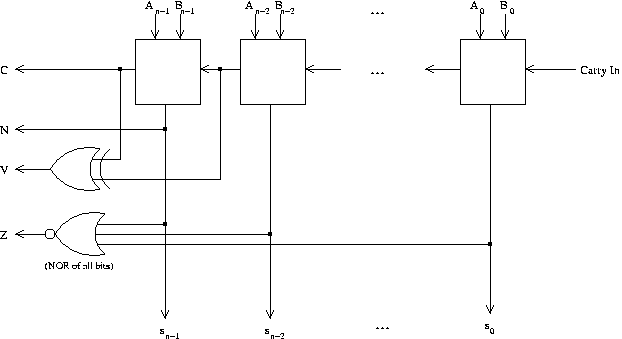
This diagram is simplified in one particular way:
it omits the wiring of
the "function" control lines into every little one-bit ALU
bit-slice.
The upper diagram shows how these lines will go into each one-bit bit-slice.
The condition code values coming out on the left-hand side will be latched in
a condition code register.
For information about this and other issues in the connection of the ALU to
the rest of the CPU, see the "ALU interface" section, next.
This is part of the "microprogramming notes" web pages, which contain the
following subtopics:
- Simple one-bus CPU architecture
- Register in / out connections
- Microcode examples
- ALU architecture (insides) <-- you are here
- ALU interface (outsides)
- Control circuitry
- Simple two-bus CPU architecture
- Simple three-bus CPU architecture (used in RISCs)
[list of course notes topics available]
[main course page]